

It's time to get out your brushes and make your mark!
Gather up an assortment of shapes and sizes and mix up a big wash of soupy paint.

Load up your brush with paint and use the whole brush from tip to base and stamp with it.
Each brush will naturally create a different mark due to its unique shape and size.

Practice making strokes with your brush.
Start with the stamping action and then draw your brush in random directions.
Start with the stamping action and then draw your brush in random directions.
Make short strokes, long strokes and swirling strokes.

Create calligraphic lines by change the pressure on your brush.
Start with a light hand and just use the tip of your brush,
then add weight and pressure to change the width of your line.
Lift the pressure off your brush to make a thinner, finer line.
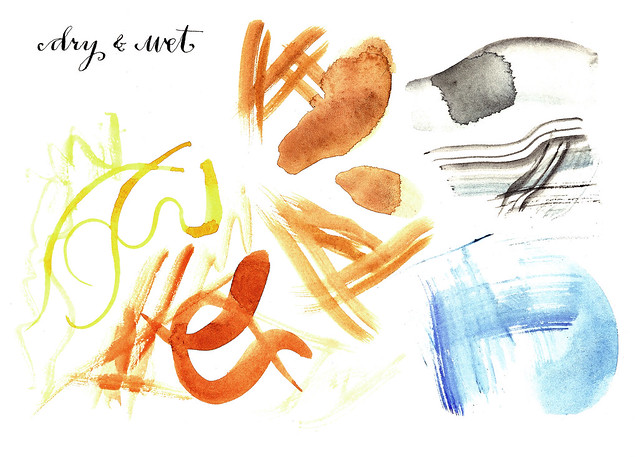
Note the difference in the marks you can make by working with a dry or wet brush.
With a dry brush the bristles splay out and separate, creating a textured mark.
A wet brush will create a more even flowing brush stroke.
With a dry brush the bristles splay out and separate, creating a textured mark.
A wet brush will create a more even flowing brush stroke.

Paint simple shapes and forms in both positive and negative.
Try different brushes, layer your brush strokes and add in washes.
I'm sure you will come up with your very own marvelous combinations!
If you have any questions post them below.
Try different brushes, layer your brush strokes and add in washes.
I'm sure you will come up with your very own marvelous combinations!
If you have any questions post them below.


11 comments:
It's amazing how many different sorts of marks you can make with brushes... experimenting is too much fun! :)
This looks like fun -- you've demonstrated a lot in this post & I can't wait to try out my brushes! Thank you for sharing this.
Love these:)I've decided I don't want to use acrylics anymore. I love the feel of a loaded watercolor brush and I've switched to gouache instead of acrylics for more 'body'. The brushes are the same for watercolor and gouache and they feel wonderful. I am sure you know what I mean:) In praise of the watercolor brush then!!!
generous
& informative
thanks
x ...
***
lamina: experimenting is the key! I hope everyone will find their own, unique style of mark making.
luanne: give it a go! dive in.
annamaria: your gouache and watercolor paintings are exquisite - i would love to be a fly on the wall in your studio.
talent trawl: it's my pleasure. This series has really made me think more about what i do and has prompted a little research too. :)
Can you please share what kind of nib you are using in your dipping pen to make this beautiful black thick+thin lettering.
thanks
Jeannie: Actually, I mostly use a crow quill or a quill type nib, this isn't the one I use most often, this is a bowl pointed nib and would fit a standard dipping pen holder, while the quill types fit a round holder. Changing the pressure and angle on your pen, no matter which nib, will produce a lovely, calligraphic line. I'm a lefty, so if I can do it, anyone can! It just takes practice.
This is really fantastic,
dear Holly!
Thank you very much.
Best
Ariane.
I need to take the time to play like this! Thanks for sharing :)
Ariane: My pleasure!
Carol: Do!
Just back tracking a bit Holly-- these studies make me giddy. Beautiful!
Post a Comment